


Neutrino Build and Travel Tips
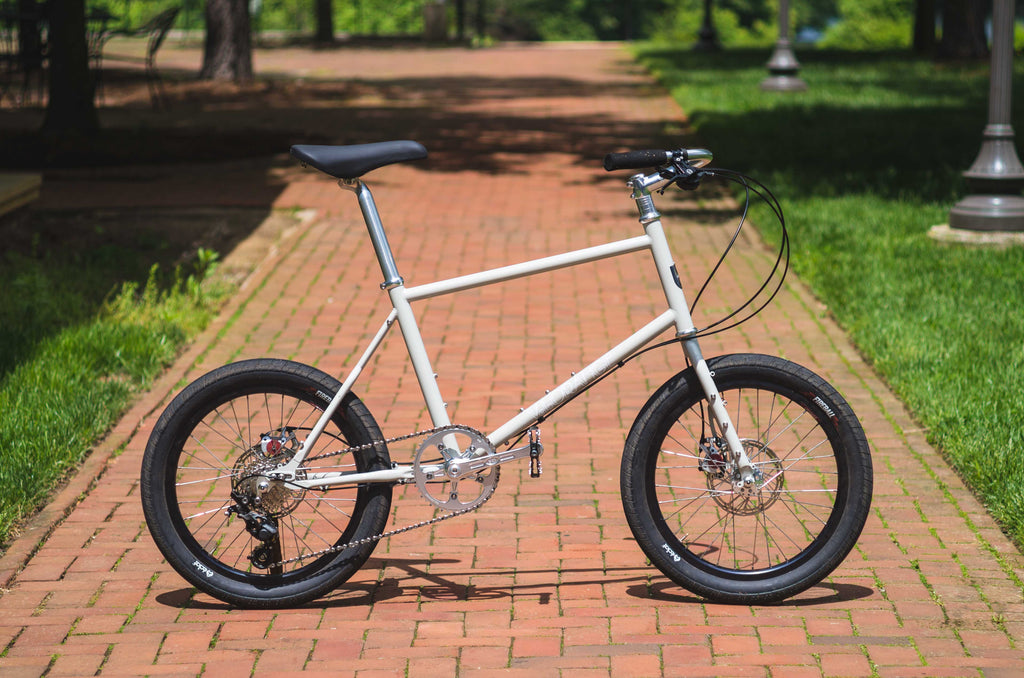
The Neutrino was designed with travel in mind. With 2.3” tires and conveniently small size, you can take it just about anywhere! This article will help you optimize fit, and get your bike set up for travel.
Sizing and Fit
We carefully tweaked the geometry to obtain a completely normal riding bike without any drama. Since the sizing is a bit less-than-traditional, we generally suggest folks that are 5'6" (168cm) and under go with a Small, and folks between 5'6" and 6' (183cm) go with a Large. If you're 6'1" to 6'4" (193cm), go with a XX-Large. Please see the geometry chart below to find the best size for you:

Cockpit position
As a general rule, the higher your stem position on the fork steerer, the shorter reach becomes. This is because the headtube angles back towards the rider. This is demonstrated in the image below.

Rounding the numbers, you can see a 90mm stem with 140mm riser bars (about 5.5”) gives you the same position as a 130mm stem further up the steerer. For the sake of demonstration I’m using a 0 rise stem above. I measured my bar position to be 1000mm off the ground for this mock up. It’s an easy to measure way to compare handlebar height between bikes.
To shorten the reach, place the stem higher on the fork steerer and add spacers. To increase the reach, place the stem lower on the fork steerer and use riser bars to achieve a similar stack height.
I have long arms and generally require more reach on my flat bar builds, but am fairly flexible. I went with a long stem, lower down the steerer with short riser bars.
Saddle position
As for most frames, you can determine your saddle height by measuring the center of the bottom bracket to the top of your saddle. The same goes for the Neutrino. It has a normal bottom bracket height. The only unusual difference with the Neutrino frame is the short seat tube. This short seat tube keeps it within our airline box constraints. Riders with unusually long inseams should check maximum seatpost extension dimensions for building up this frame.
We spec a 31.6mm diameter seatpost for extra strength in longer extensions. It also allows compatibility with many externally routed dropper posts.
Build Tips & Component Choice
The components of the Neutrino follow common standards for the most part. The only somewhat unusual components would be the wheels, which are just standard 100mm front/135mm rear disc brake hubs laced to standard 20” bmx rims. We currently offer a complete wheelset with VO Touring Hubs laced to Velocity 406 Rims.
Crank
If you have larger feet, I would recommend selecting a crank with a slightly larger Q factor or running a slightly longer bottom bracket than usual. The short chainstays make heel clearance a little tight for riders with bigger feet. For reference, I wear size 11 Sambas. On the Neutrino, I ride a standard Campagnolo road crank (narrow Q factor) with wide mountain bike pedals to keep my heels off the chainstays. We are spec-ing a 110 to 113 mm bottom bracket with our single speed crank on complete builds. A gravel bike crank or a mountain bike crank with a larger chainring would be ideal for this bike.
Gearing
While on the topic of cranks I’d like to put in some gearing recommendations. The small wheels put you at a pretty low gear ratio so there’s generally no need to put a giant cassette in the rear. Additionally, long cage derailleurs come fairly close to your tires. We spec a short cage Shimano Zee derailleur with a Shimano 105 cassette. Personally I run a 39t chainring with a 12t cog and run it single speed for easy breakdown in travel. I’d recommend consulting a gear inch calculator if you have any questions.
Travel specific build tips
If you intend to travel with your Neutrino, I have a few suggestions for component choices. First, handlebars. I would recommend flat, riser, or sweptback style bars for travel. Dropbars are going to be much harder to fit in a small box. Second, I’d recommend going without a dropper post or anything containing compressed air if you intend to travel to Asia. Many countries in Asia are strict about flying with pressurized parts, so it’s best to leave these parts off and deflate your tires. Last, consider the breakdown process. Make it easy for yourself. Keep it simple and easy to assemble and breakdown. I enjoy riding singlespeeds, and I think they make it easy to travel. If you’re planning on bringing bags, I’d recommend “bikepacking” style bags or rackless bags to keep it simple and easy to pack. For a crank, I’d recommend something that takes a hex wrench to remove or something with self extracting caps so you don’t have to bring a crank puller along.
Travel Tips

Ok! So now you have your bike built and you want to bring it somewhere in a box! First off, the box the frame came in is an airline acceptable size! Cheap, reusable, and recycle it when the baggage handlers punch too many holes in it!
When you’re packing your frame, you’ll want to keep everything tight and tidy. Rattling parts can damage your frame. The shape of the box makes it easy to hold everything together tightly. When I would travel with my S&S coupled bike, there was all sorts of empty space in the bag. Filling it required a lot of excess packaging materials and put me close to the weight limit for checked bags.
How the h*ck does it fit in a box?
With the right components, your bike should fit in an airline acceptable box. Here’s a big list of little things I do to save space:
-Remove the bars
-Remove the fork
-Deflate the tires
-Remove the freehub body with the cassette still attached (easy if you have our Grand Cru hubs)
-Take off the crank
-Take off the sliding dropouts - this shortens the frame and keeps those bits safe
-Rotate your stem so it sits flush with your bars if you have riser or swept bars
Safety Second!
Here’s a list of things to protect your bike in transit:
-Tape up your box where it contacts the frame or the wheel axles
-Remove your rotors and put them in something flat. I use a piece of folded cardboard.
-Use clothes as padding. You’re already bringing them...right?
-Save the rear triangle dowel your frame came with! It will keep your rear from getting crushed while in transit ![]()
Stay Clean // Stay Organized
Here are some additional packing tips to keep you sane and organized:
-Keep your chain attached to your frame, but in a Ziplock bag to keep it from making a greasy mess.
-Pack gloves and a shop rag for cleanup and additional padding!
-Keep all removed components in Ziplock bags and bring extras.
-Keep your brake lines intact or even still attached to your bars. We use full length cable housing so you can remove your caliper, take off the whole brake line, and neatly store it in a Ziplock bag. I even keep my levers attached to my bars.
End Notes
Now that you have your bike built up, take it somewhere cool! If you want to, send us pictures and tag us on Instagram! #veloorange #tinybikeclub